
Here’s a stat that should make every daily curling-iron user pause: researchers cited by Dyson found that flat irons and curling irons can damage up to 85% of your hair’s keratin proteins, leaving strands brittle, dry, and prone to breakage. K18 Hair’s research lab confirms that temperatures above 392°F begin to denature the keratin proteins in your hair’s cortex — and most curling irons sold today go up to 450°F.
The frustrating part? You don’t actually need heat to get gorgeous curls. The natural hair industry has spent the last few years perfecting heatless curling techniques that now consistently deliver salon-quality results — and many of them work better than your old curling wand.
Why This Matters: The Real Science of Heat Damage
Heat damage isn’t just “my hair feels dry” — it’s measurable, scientific protein destruction. Here’s what’s actually happening when you use a curling iron:
- Hair is 79% protein (keratin). Keratin proteins are stable at normal temperatures, but begin to denature (permanently break down) above 150°C / 302°F. Source: Kibo Clinics 2026.
- Most flat irons and curling wands reach 400-450°F (204-232°C). This is double the temperature at which keratin damage starts.
- K18 Hair’s research notes: the cuticle (the outer protective layer of hair) can withstand temperatures up to 482°F before breaking down — but the inner cortex starts denaturing at 392°F. Once the cortex is damaged, the change is permanent.
- Per a survey by InStyle (cited in Dyson’s heat-damage report): frizz is the #1 hair complaint (63% of women), followed by breakage and split ends (60%), and dryness (55%) — and the biggest single culprit across all three is heat.
- Hair stylists at Kibo Clinics recommend limiting hot tools to 2-3 times per week maximum. Daily use creates cumulative damage faster than your hair can recover from.
The takeaway: heatless methods aren’t just a trendy alternative. They’re the only way to curl hair without slowly destroying its protein structure over time.
What You’ll Need (for the Main Silk Ribbon Method)
- A silk heatless curler ribbon (available from The Silk Collection, Eternal Muse, Amazon, etc.) OR a soft bathrobe tie OR a cut-up cotton t-shirt strip
- 2 silk or soft scrunchies
- Light styling cream, mousse, or sea salt spray
- A wide-tooth comb
- A spray bottle of water (in case sections dry out)
- Flexible-hold hairspray or texture spray for finishing
- Optional but recommended: silk pillowcase or satin bonnet
Hair Condition Matters: Start Here Before Any Method
Two facts about heatless curls that most tutorials skip:
1. Hair must be DAMP, not wet or dry. Per The Silk Collection’s 2026 guide and Mint Arrow’s beginner tutorial, the sweet spot is 70-80% dry. Sopping wet hair won’t dry through the night; fully dry hair won’t take the curl.
2. Healthy hair holds heatless curls better than damaged hair. Karseell’s 2026 heat-damage guide notes: “The better condition your hair is in, the better it will look without any heat at all.” If your hair is heavily damaged from past heat use, do a protein-rich deep conditioning treatment 1-2 days before attempting heatless curls. Protein treatments temporarily restore strength to heat-damaged hair by filling in gaps in the cuticle.
The Main Method: Silk Ribbon Overnight Curls (Step-by-Step)
This is the viral 2026 method that has earned tens of millions of TikTok views (per Eternal Muse Hair’s tutorial alone, 411K+ likes on a single post). It works on every hair type and length from shoulder to waist, takes under 5 minutes to set up, and delivers blow-out style curls overnight with zero heat. Here’s how to do it correctly.
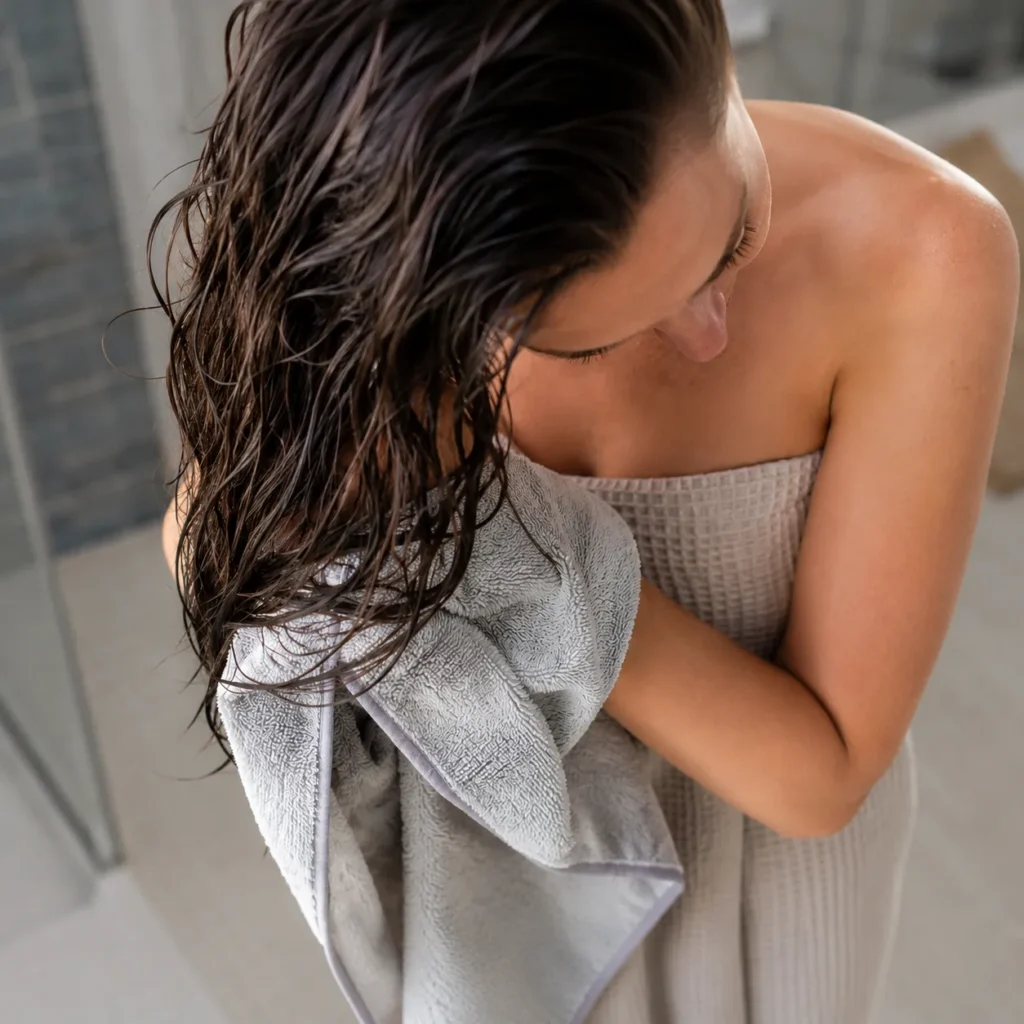
Step 1: Wash and Towel-Dry to 70% Damp
Time: 5-10 minutes (depending on hair length)
Heatless curls work because hair sets its shape as it dries. That means you have to start with damp — not soaking wet, not fully dry — hair. The Silk Collection’s 2026 guide and Mint Arrow’s beginner tutorial both emphasize this is the #1 mistake people make.
Wash and condition your hair as usual, then gently squeeze out excess water with a microfiber towel or old cotton t-shirt (regular bath towels cause frizz). You’re aiming for around 70-80% damp — your hair should feel cool to the touch but not dripping.
If your hair is already dry, lightly mist it with water in a spray bottle until evenly damp throughout. Sopping wet hair won’t dry overnight; bone-dry hair won’t take the curl.
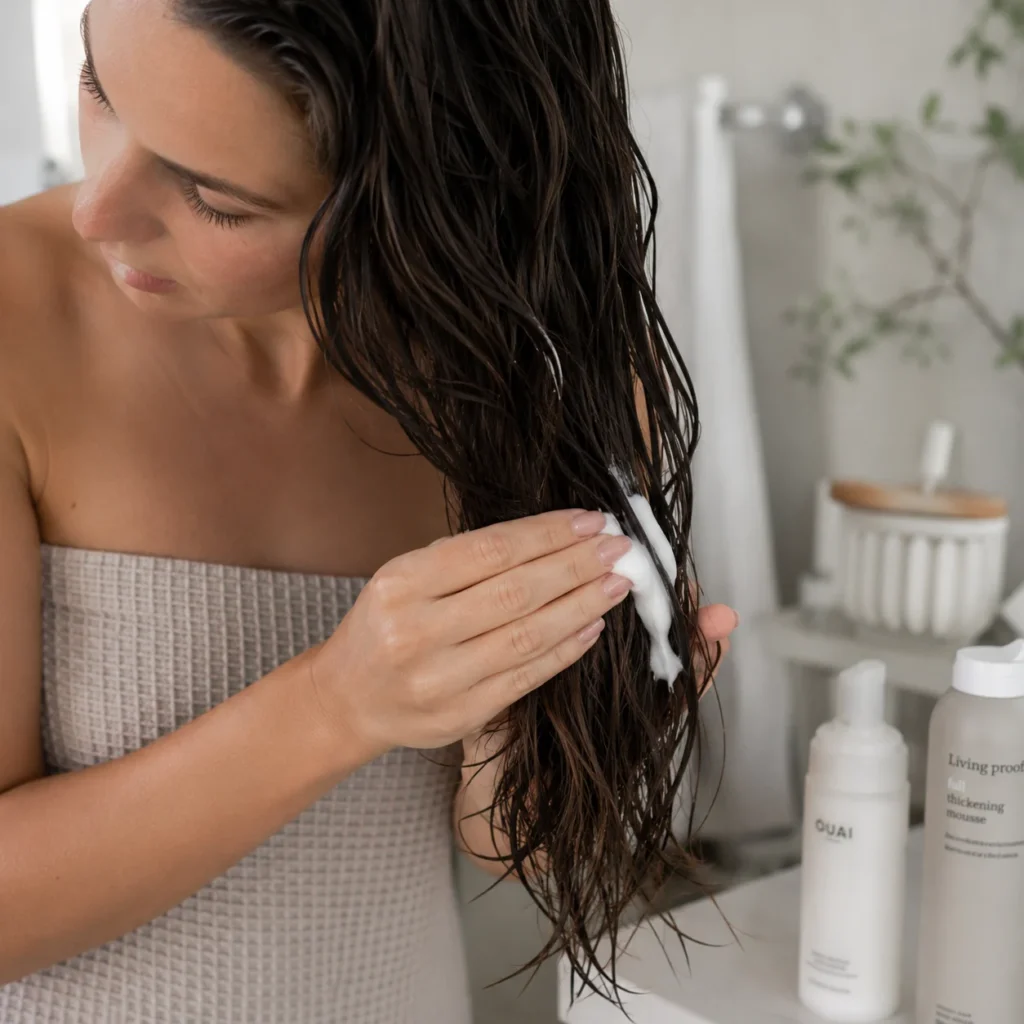
Step 2: Apply a Light Styling Cream or Mousse
Time: 1 minute
Without product, your curls will fall out within hours. Work a small amount of styling cream, light mousse, or curl-defining cream evenly through your hair from mid-lengths to ends. A coin-sized amount is plenty for most hair types — too much makes hair crunchy.
Mint Arrow’s 2026 tutorial recommends a lightweight mousse for long or thick hair. For fine hair, use a sea salt spray or texture spray instead — heavier products will weigh down the curls.
Comb the product through with a wide-tooth comb to distribute evenly. Avoid the very roots — product there leads to greasy-looking curls and faster fall-out.
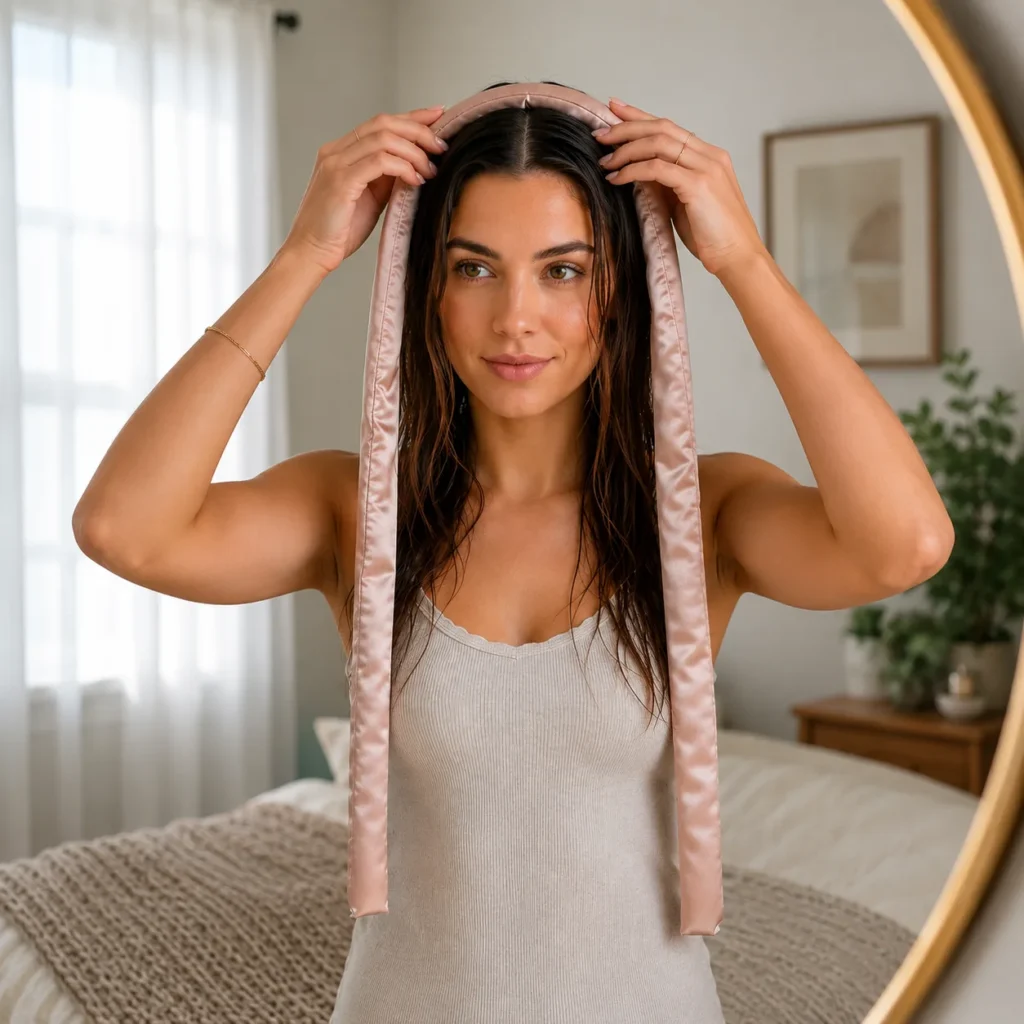
Step 3: Place the Silk Ribbon (or Robe Tie) on Top of Your Head
Time: 30 seconds
Center a silk heatless curler ribbon, a soft bathrobe tie, or a t-shirt strip across the top of your head — like a headband. The middle of the ribbon should sit on the crown, with equal lengths hanging down each side.
Secure it with a small claw clip or scrunchie at the crown to keep it from sliding. The Silk Collection’s 2026 method uses a built-in headband loop; if you’re using a robe tie, just hold it in place with one hand to start.
Part your hair down the middle with the ribbon resting on top — you’ll wrap each side separately.
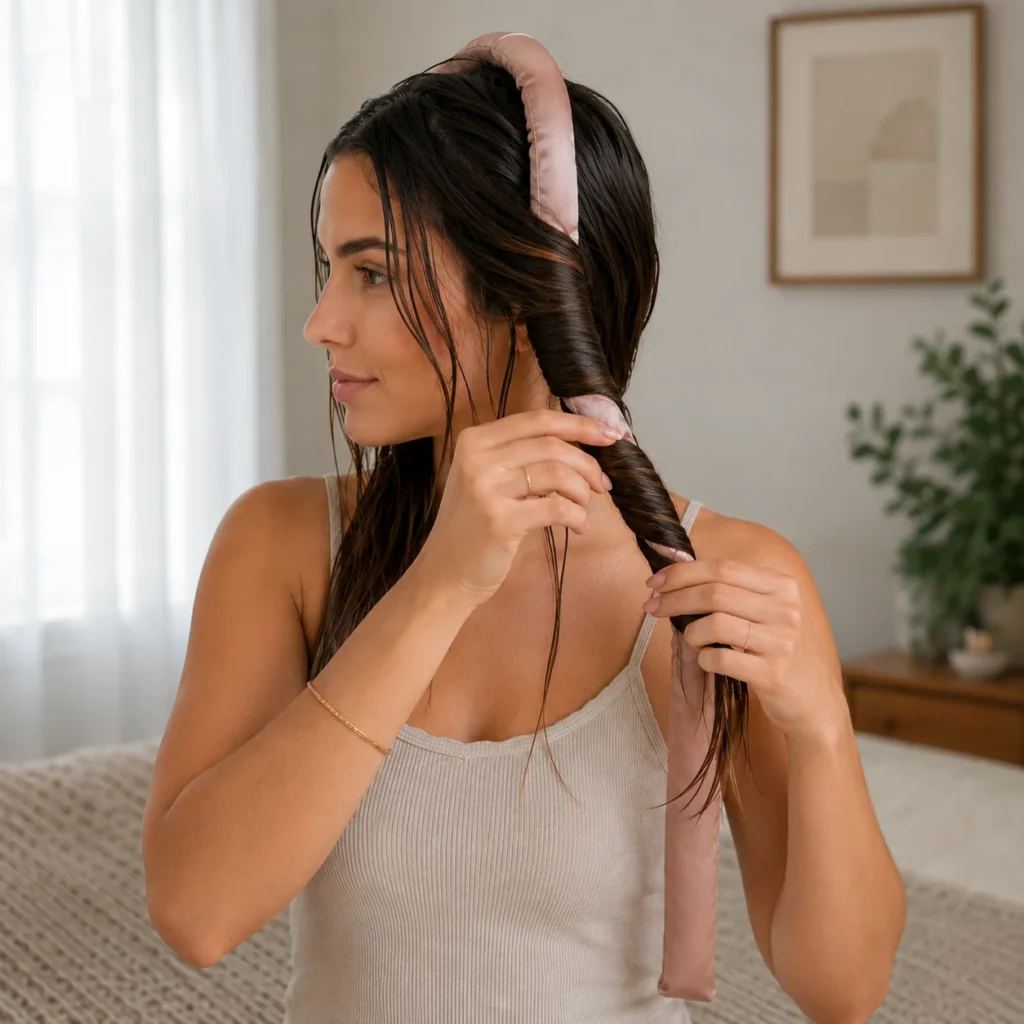
Step 4: Wrap the First Side Around the Ribbon
Time: 1-2 minutes per side
Take all the hair on your right side and start at the top. Wrap it smoothly around the ribbon, working downward toward the ends. Keep the hair flat and smooth as you wrap — twisting or clumping it creates frizzy, uneven curls (the Mint Arrow 2026 guide flags this as a top mistake).
Wrap away from your face for that classic blow-out curl direction. Each wrap should overlap slightly with the previous one.
Continue wrapping all the way to the ends. If your hair gets dry while wrapping, spritz with a water bottle to re-dampen — it must stay damp to set.
Step 5: Secure the Ends with a Soft Scrunchie
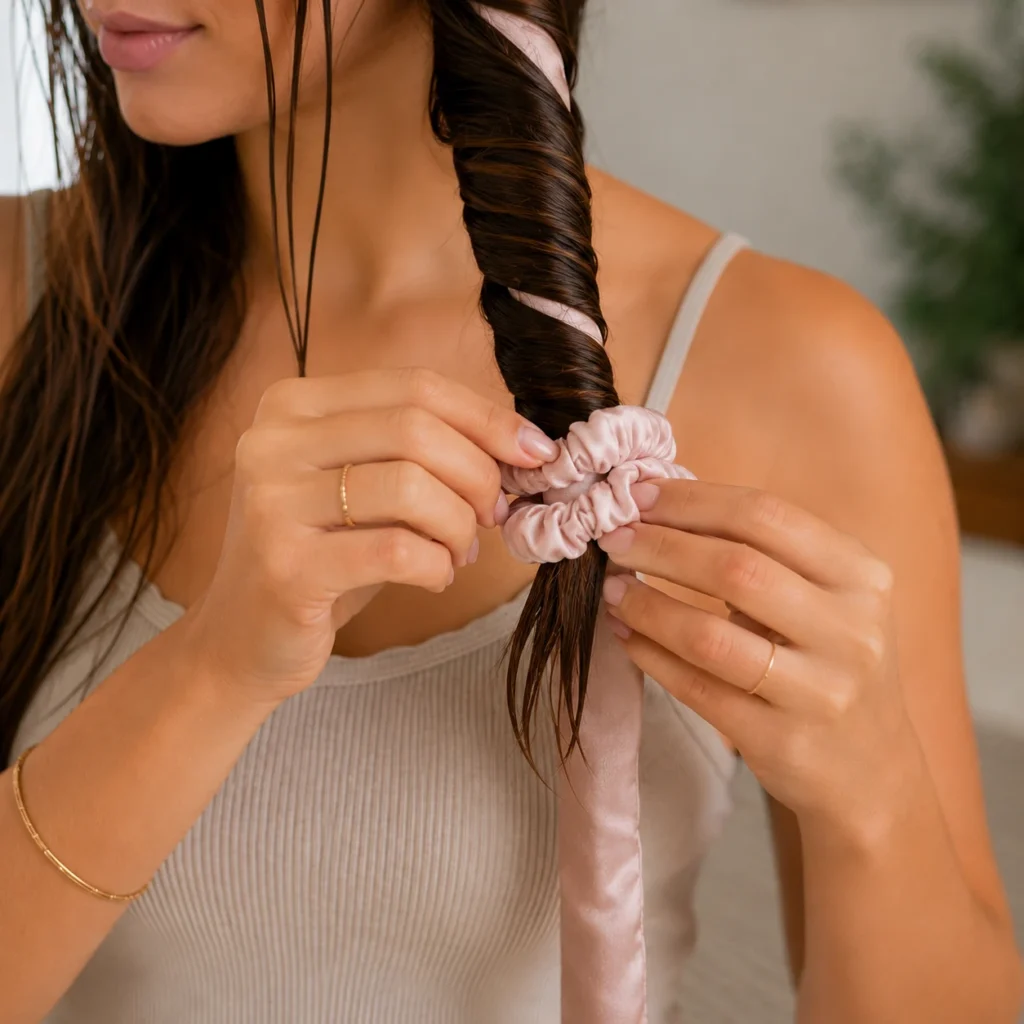
Time: 15 seconds
Once you reach the ends of your hair, tuck them under the last wrap or secure with a small silk scrunchie at the very bottom of the ribbon. Don’t use a tight elastic — it will leave a crease in your curls and could break your hair.
Pro tip from the Silk Collection’s 2026 guide: make sure the ends of your hair lay flat or peek out of the scrunchie. Hair that gets crumpled inside the scrunchie will dry crimped, not curled.
Repeat steps 4 and 5 on the other side of your head.
Step 6: Sleep On It (Or Wait 4-6 Hours)
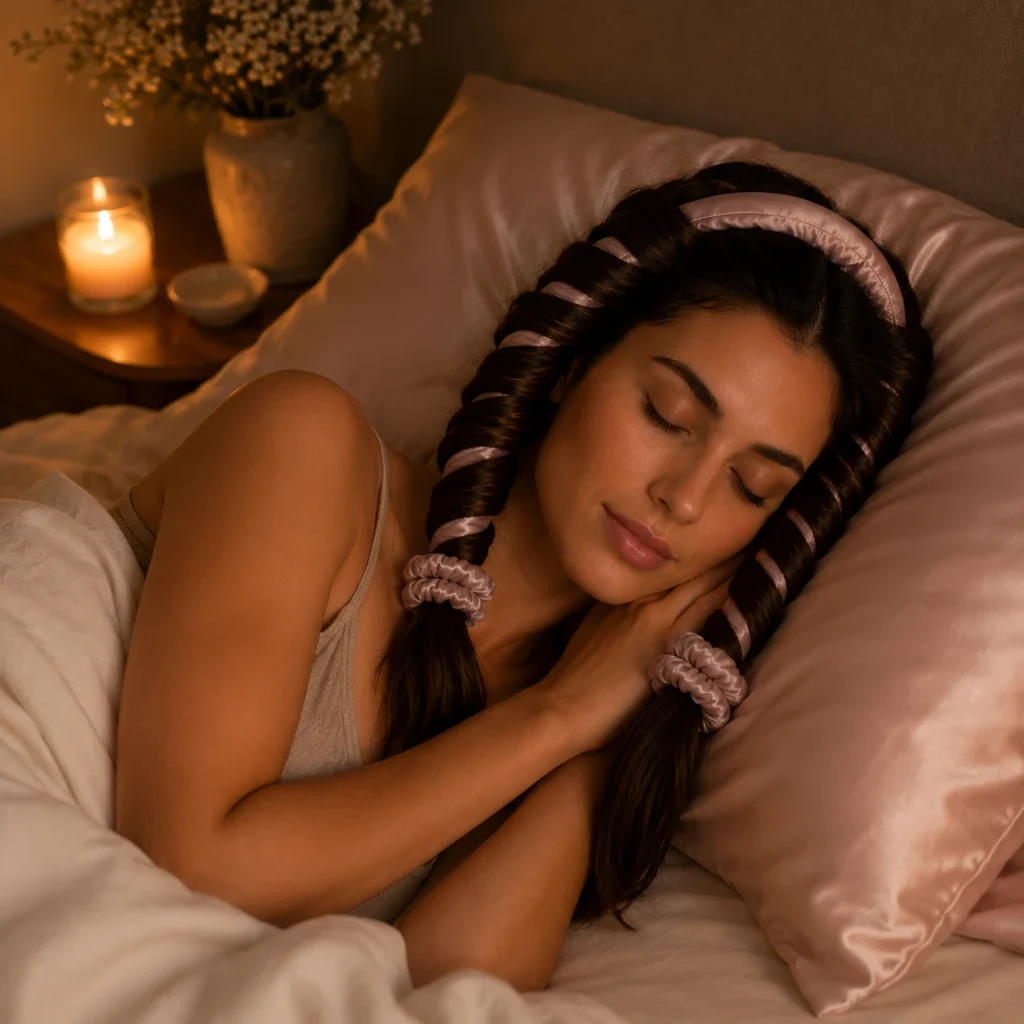
Time: Overnight (6-8 hours) or 4-6 hours minimum
This is when the magic happens — but only if you give it enough time. Hair needs to fully dry while wrapped for the curl to set. The Silk Collection’s 2026 guide recommends overnight (6-8 hours) for the longest-lasting result.
If you’re sleeping on it, the silk ribbon is comfortable and stays in place naturally. Tossing and turning won’t ruin it. For extra security, sleep on a silk pillowcase or wear a soft satin bonnet over the top.
If you’re in a rush, you can do it on 70-80% dry hair and leave in for 2-3 hours, but curls won’t hold as long. The longer your hair is wrapped, the longer the curls will last the next day.
Step 7: Unwrap Gently the Next Morning
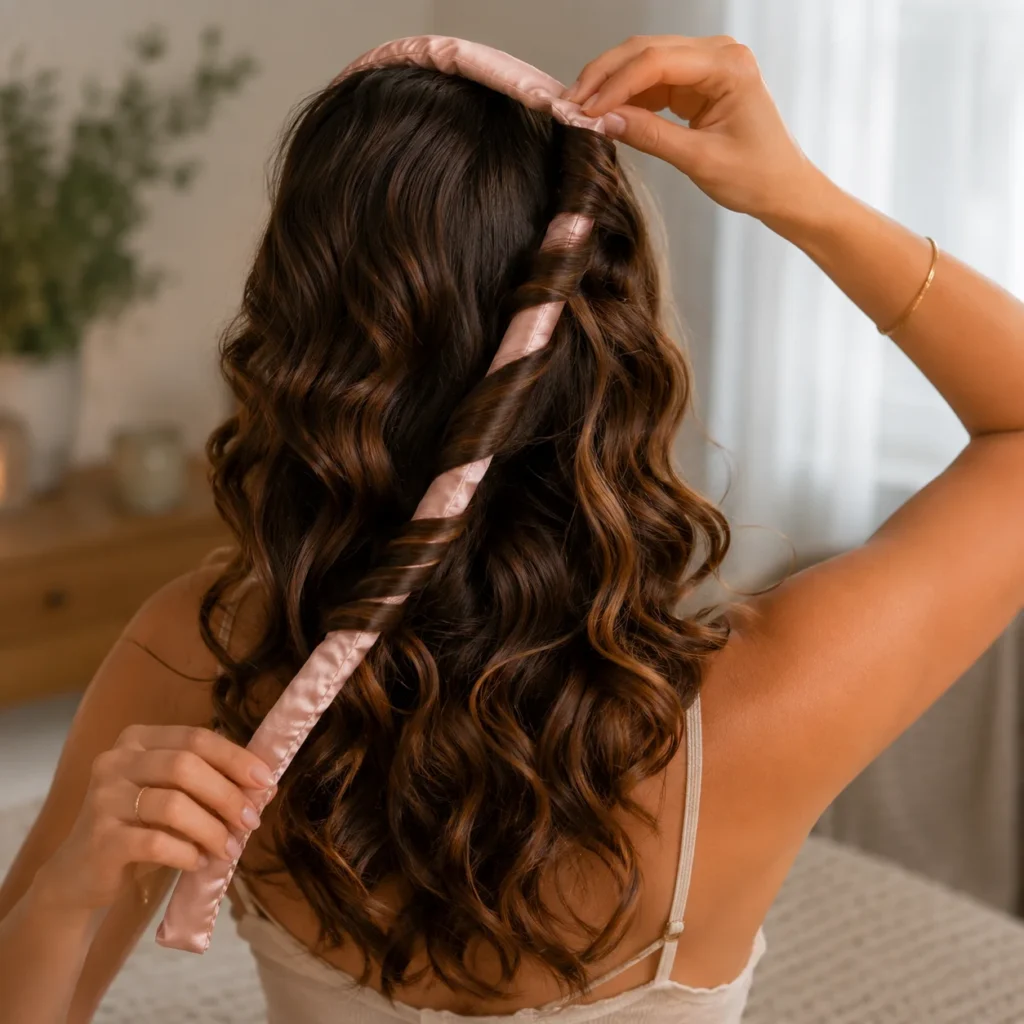
Time: 2 minutes
Remove the scrunchies first, then slowly unwind your hair from the ribbon — don’t yank it. Per the Silk Collection’s guide, try not to disturb the curls while you’re removing the ribbon.
Let each spiral fall naturally. You should see defined, glossy, blow-out style curls or waves (depending on how tightly you wrapped and your hair length).
If any curls look uneven, that section was probably twisted instead of flat during wrapping — fix it next time by smoothing the hair before each wrap.
Step 8: Separate, Style, and Set
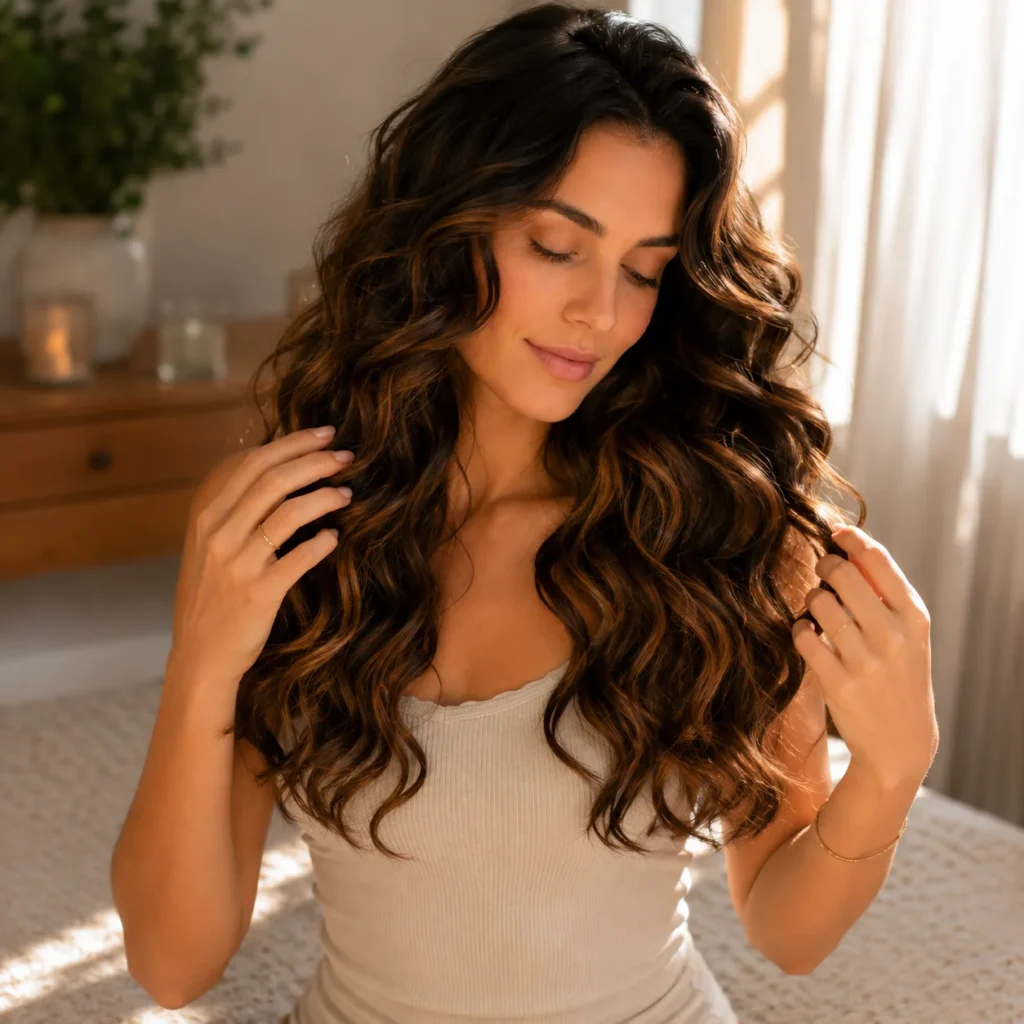
Time: 1-2 minutes
Use your fingers — never a brush — to gently separate the curls into smaller waves. The Silk Collection 2026 method specifically warns: a brush will cause frizz and brush out the curls completely.
For tighter, more defined curls, leave them as-is. For loose, beachy waves, run your fingers through and shake your roots gently.
Mist with a flexible-hold hairspray or texture spray about 12 inches from your head. Done — and zero heat damage.
4 More Heatless Curling Methods (Pick What Fits Your Hair)
The silk ribbon method is the gold standard, but it’s not the only way. Here are four more proven heatless techniques, each suited to a different hair type or curl preference:
Method 2: The Sock Bun / Hair Donut Method

Popularized by Luxy Hair, this method creates voluminous beachy waves with a single hair donut (or a cut-off sock). Works best for shoulder-length to long hair.
1. On 70% damp hair, gather all your hair into a high ponytail at the crown of your head and secure with a soft elastic.
2. Thread the ponytail through the center of a hair donut so the donut sits at the base of your ponytail.
3. Section your ponytail and wrap each section smoothly around the donut, tucking ends underneath as you go. Keep wrapping until all the hair is wound around it.
4. Secure with bobby pins. Sleep on it or leave for 4-6 hours.
5. Unwrap gently in the morning by lifting the donut up and out, then separate with fingers.
Method 3: Braid Waves (The Beginner Classic)
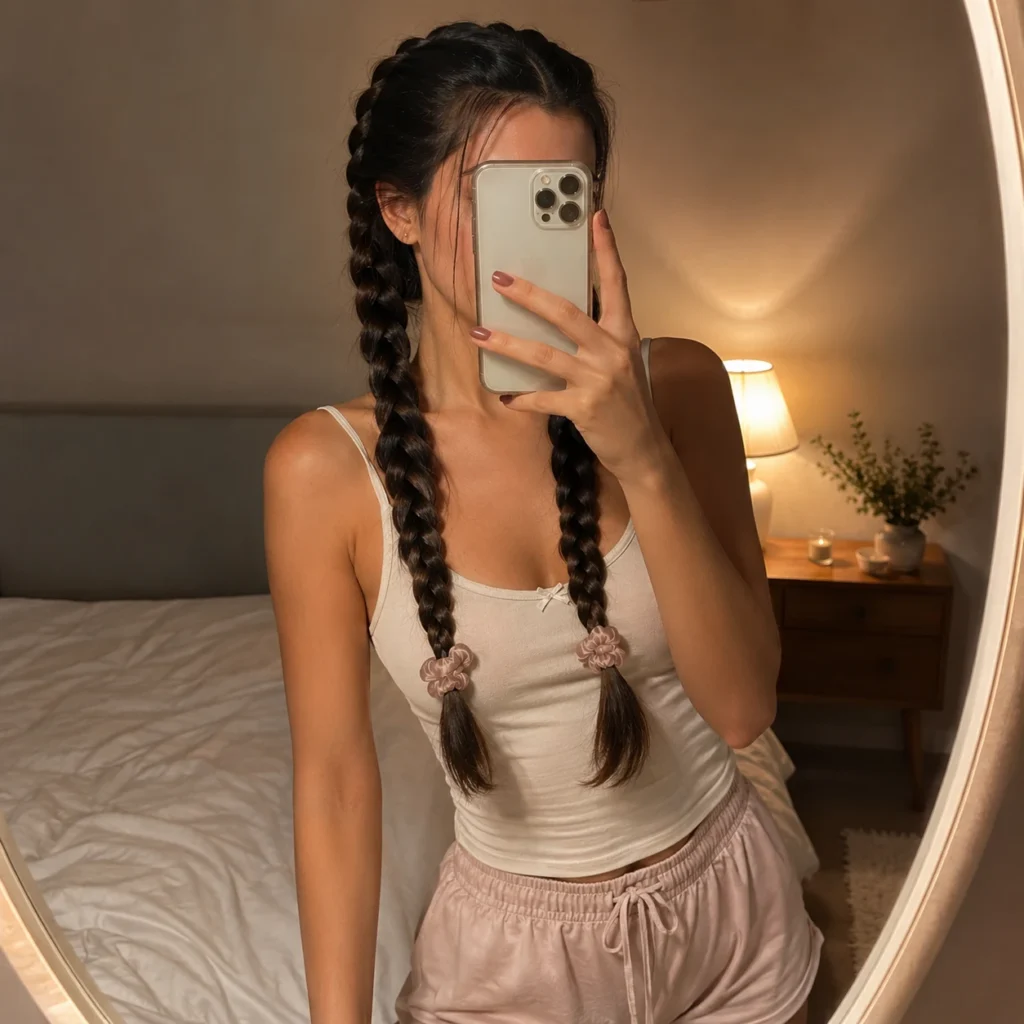
The easiest heatless method — no tools required. Best for soft, natural-looking waves rather than defined curls.
1. Start with 80% damp hair. Apply a light styling cream.
2. For loose beachy waves, do 2 braids (one on each side). For tighter mermaid waves, do 4-6 smaller braids.
3. Use silk scrunchies at the ends, not tight elastics (which leave dents).
4. Sleep on it or wait until completely dry.
5. Unbraid carefully and separate with fingers. Mist with hairspray to set.
Method 4: Flexi Rods or Foam Rollers
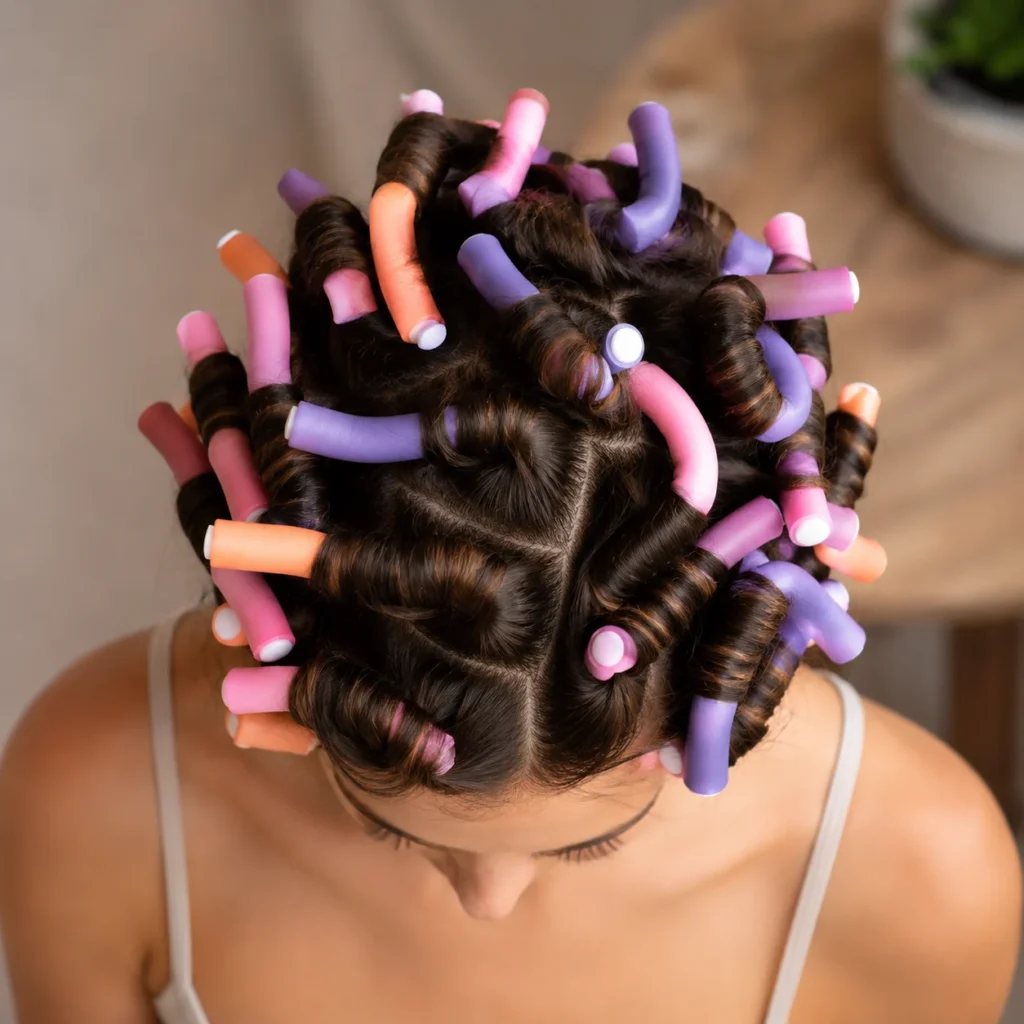
Per the Karseell 2026 heatless styling guide, flexi rods (bendable foam rods) create the most defined, longest-lasting heatless curls — especially good for tighter ringlet-style results.
1. On damp hair, apply curl cream or setting lotion.
2. Take a 1-2 inch section of hair and wrap it spirally around the flexi rod from ends to root.
3. Bend both ends of the rod inward to secure (no clip needed).
4. Repeat across your entire head — typically 12-20 rods total.
5. Sleep on it or sit under a soft fabric bonnet for 4-6 hours.
6. Unwind from the bottom up, separate with fingers, and set with light hairspray.
Method 5: The Headband Wrap Method (Greek Goddess Curls)
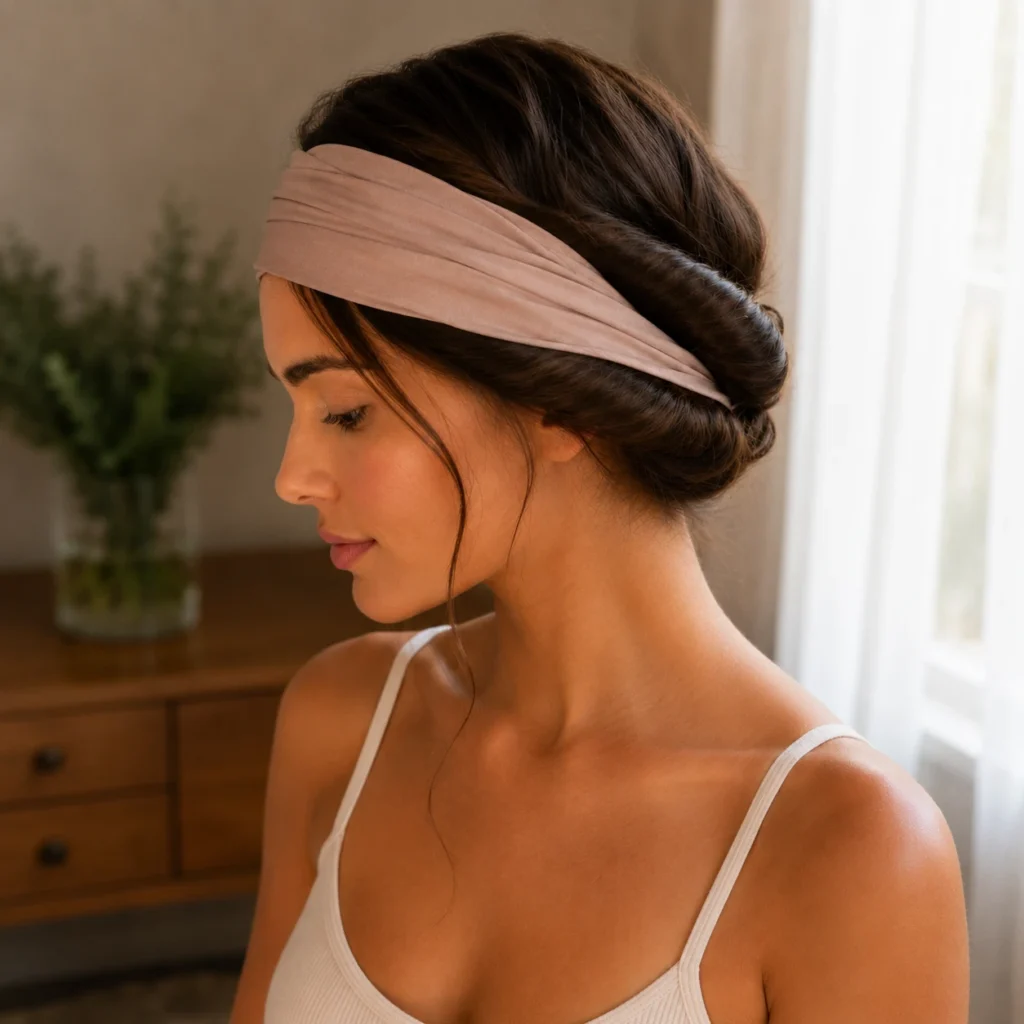
A nostalgic technique that’s gone viral again on TikTok in 2026. Creates soft, romantic waves with nothing but a stretchy headband.
1. On damp hair, place a wide elastic headband across your forehead, like a flower crown.
2. Take small sections of hair from the front and wrap each one up and over the headband, tucking the ends underneath.
3. Continue all the way around your head until all your hair is tucked into the headband. It will look like a halo or crown.
4. Sleep on it or leave for 3-4 hours.
5. Carefully unwrap each piece — slow and gentle. Separate with fingers and lightly spray to set.
Common Mistakes That Ruin Heatless Curls
If your heatless curls fall flat by lunchtime or look frizzy and uneven, the cause is almost always one of these (per Eternal Muse Hair’s 2026 troubleshooting guide):
- Hair was too wet when you started. Soaking-wet hair can’t fully dry overnight — it stays damp at the core and the curl never sets. Start at 70-80% dry, not 100%.
- Hair was too dry when you started. Fully air-dried hair won’t hold a new shape. If your hair has dried out, lightly re-mist with water.
- You skipped product. Without styling cream, mousse, or sea salt spray, curls fall out within hours. Even a small amount makes a huge difference.
- Hair clumped or twisted while wrapping. The Silk Collection’s guide is firm: hair must lay flat and smooth as you wrap. Twists and clumps create frizzy, deformed curls.
- You used a brush after unwrapping. Brushes destroy heatless curls instantly. Use fingers only.
- You used tight elastics instead of soft scrunchies. Tight elastics leave creases in the curl pattern.
- Your hair is too freshly washed. Day-old hair holds heatless styles better than super-clean hair — same principle as updos.
How Long Do Heatless Curls Last?
With proper technique and product:
- Day 1: Tight, defined curls (right after unwrapping)
- Day 2: Softer waves with movement
- Day 3: Loose beach waves (use dry shampoo and re-mist with sea salt spray to refresh)
- Day 4+: Time to re-do or sleep in a loose bun to preserve some texture
Sleeping in a silk bonnet or on a silk pillowcase between days dramatically extends curl life — per the Muriersilk 2026 curl guide, silk reduces surface friction that breaks up curl clumps.
Final Word
Heatless curling isn’t a workaround — it’s the gold standard for anyone serious about long-term hair health. Per multiple 2026 stylist sources (Kibo Clinics, K18 Hair, Karseell), the most damaging hair habit isn’t coloring or chemical treatment. It’s daily heat styling. And the good news is that one good heatless method, mastered, can replace your curling wand entirely.
Start with the silk ribbon method this weekend — Saturday night, dry overnight, perfect curls Sunday morning. Once you see the result, you’ll wonder why you ever owned a curling iron.
Sources
All current research and tutorials: The Silk Collection (How to Use a Heatless Curler 2026 Guide), Mint Arrow (TikTok’s Famous Heatless Curls: Beginner Guide 2026), Eternal Muse Hair (overnight curl tutorial with 411K+ TikTok likes), Luxy Hair (12 Ways to Get Heatless Curls Fast), K18 Hair (Science Class 17: The Science Behind Heat Damage), Dyson (Heat Damaged Hair: Causes, Treatments, and Prevention – citing Phys.org research and InStyle survey data), Karseell (Heat Styling Damage: How to Repair and Prevent), Kibo Clinics (Straighteners and Curling Irons: Hair Damage 2026 Guide), Pritech (Permanent Curls vs. Daily Curling Iron Use), Muriersilk (Silk for Curly Hair 2026 Complete Guide). Scientific reference: McMullen & Jachowicz, “Thermal Degradation of Hair I: Effect of Curling Irons,” International Specialty Products.